Crochet Stacking Toy Patterns: Fun DIY Projects
Introduction to Crochet Stacking Toys
Crochet stacking toys are whimsical, soft, and educational playthings for young children. They usually consist of multiple components that fit together in a specific order, challenging kids’ motor skills and problem-solving abilities. Made from yarn through the art of crochet, these toys offer a handmade, cozy charm that can’t be found in store-bought items.
Creating crochet stacking toys is not only a way to craft a personal gift but also an enjoyable hobby that can relax the mind. This endeavor combines creativity with precision as each piece must fit neatly atop the other. The patterns vary from simple rings to intricate animals or themed designs, catering to different tastes and skill levels.
For parents and caregivers, crochet stacking toys present a safe and washable option for their little ones. Unlike plastic toys, these crocheted treasures are gentle on the hands and free from sharp edges. They embody the beauty of crafting and the joy of play, intertwined in a series of easy-to-grasp shapes.
With a variety of crochet stacking toy patterns available, anyone can take up the project whether they are new to crocheting or seasoned veterans. This blog aims to guide you through the process, from selecting materials to adding the finishing touches on your creation. Follow along as we delve into the charming world of crochet stacking toys.

Essential Materials for Crochet Stacking Toys
To begin crafting your crochet stacking toy patterns, you’ll need several key materials. These essentials will ensure your finished toy is soft, durable, and enjoyable for those little hands to play with.
- Yarn: Selecting the right type of yarn is crucial. Soft, hypoallergenic yarns like cotton or acrylic are ideal, especially if the toy will be used by children with sensitive skin. The yarn color depends on your desired look, and toddler-friendly colors are often bright and engaging.
- Crochet Hooks: Hooks come in various sizes. The size of the hook should match the weight of your yarn to achieve the proper tension and smoothness in your stitches. For most stacking toys, a mid-range hook, around 4mm to 5mm, is typically a good choice.
- Stuffing: High-quality, non-allergenic fiberfill is recommended to give volume to your crochet stacking toys. It should be soft yet resilient to maintain shape after many play sessions.
- Stitch Markers: These small tools are a crocheter’s best friend, helping to keep track of stitch counts and rounds when creating each piece of the toy.
- Embroidery Floss and Needle: For adding facial features or other intricate details, embroidery floss and a sharp needle will do the trick, providing a neat finished look.
- Scissors: A sharp pair of scissors is essential for cutting yarn and trimming any loose ends after you finish crocheting each part of the toy.
- Safety Eyes (optional): If you’re aiming for a toy with more character, safety eyes are a safe option for toys intended for young children. Always ensure they’re securely attached.
Step-by-Step Guide to Making a Basic Crochet Stacking Toy
Embarking on the creation of a crochet stacking toy starts by following these straightforward steps. Let’s dive into crafting a basic toy that any novice or experienced crocheter can tackle.
- Choose Your Pattern: Start by selecting one of the many crochet stacking toy patterns. Choose a basic shape like rings or simple animals for your first project.
- Gather Materials: Referring to the essential materials listed earlier, collect everything you need. Make sure your yarn, crochet hooks, stuffing, and other tools are at hand.
- Make the Base: Begin with the largest piece which will form the base. This could be a circle or a square, depending on your pattern.
- Crochet the Stackable Pieces: Work your way from the largest piece to the smallest, crocheting each component that will stack on the base.
- Add Details: If your toy has facial features or designs, use embroidery floss and a needle to add these before assembling.
- Assemble Your Toy: Once all parts are crocheted, stuff each piece firmly and sew them together. Ensure they stack correctly.
- Attach Safety Eyes (if used): If your design includes eyes, firmly attach safety eyes to the toy. Double-check that they’re secure.
- Inspect Your Toy: Look over the toy to ensure there are no loose ends or sharp edges. The toy should be safe and sturdy for play.
- Enjoy Your Creation: Your crochet stacking toy is now ready. Marvel at your handiwork before gifting it to a special child.
With these steps, you can create delightful crochet stacking toys that will enchant and educate. As you become more confident, you can try more complex patterns and designs. Happy crocheting!
Creative Crochet Stacking Toy Designs
Exploring creative designs is a joyous part of crafting crochet stacking toy patterns.
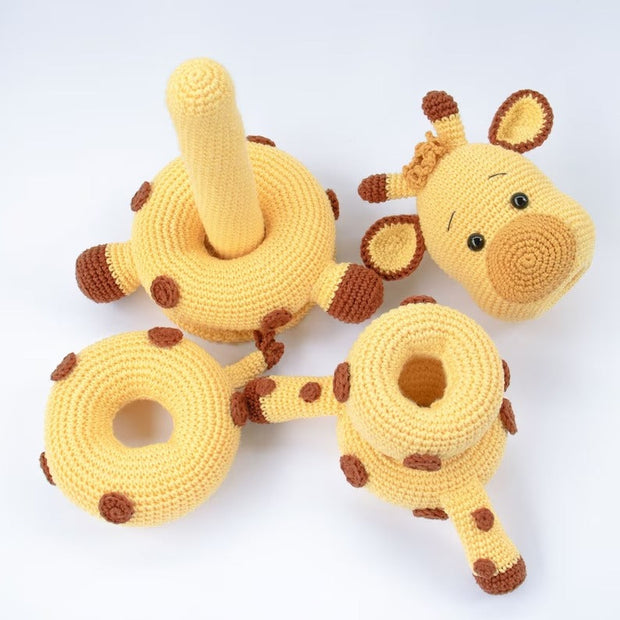
- Animal-Themed Toys: Delight children with animal designs. Think of stackable lions, elephants, or turtles. Each layer can represent a part of the animal, making playtime educational and fun.
- Colorful Shapes: Mix and match various geometric shapes in bright colors. Squares, circles, and triangles in different sizes teach shape recognition as they stack.
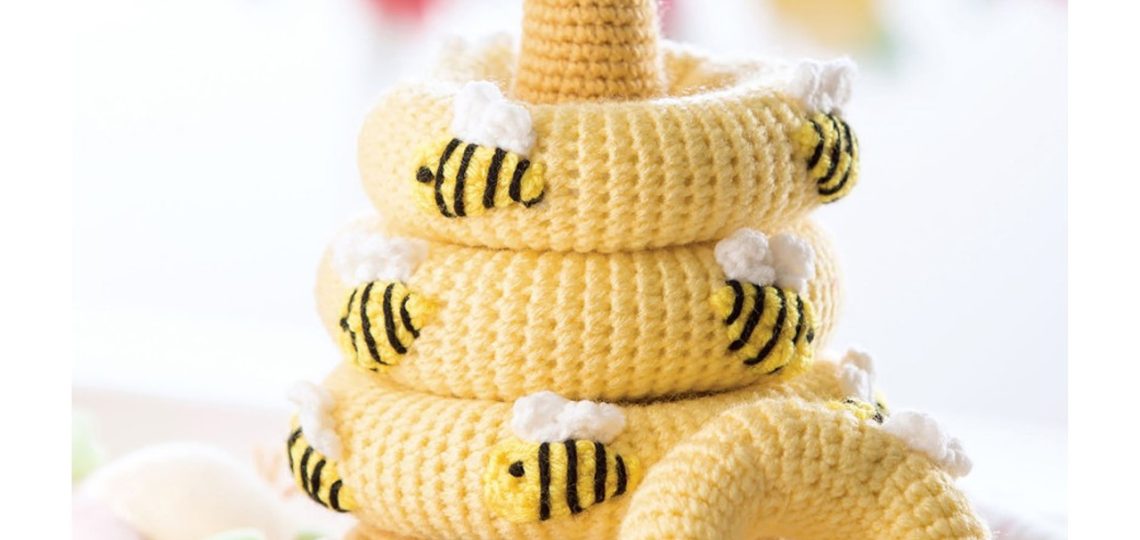
- Nature-Inspired Stacks: Create a garden stack with flowers, bees, and ladybugs. Or a sea stack with fish, seaweed, and starfish. They’re cute and can spark conversations about the natural world.
- Seasonal Themes: Design toys based on seasons or holidays. A Christmas tree with detachable ornaments or a stackable snowman can double as festive decor.
- Educational Sets: Go beyond play. Design stacking blocks with numbers or letters. They can help kids learn as they play by building words or practicing counting.
- Interactive Features: Add elements like bells, squeakers, or crinkly fabric inside layers for sensory play. These features can enhance the play experience and keep little ones engaged.
Remember, the key to a successful crochet stacking toy is in the details. Keep designs simple yet stimulating. Ensure pieces can stack easily and are durable for repeated play. With imagination as your guide, the possibilities are endless. Happy crocheting!
Tips and Tricks for Perfecting Crochet Stacking Toy Patterns
Creating crochet stacking toys is an enjoyable process, but small tips and tricks can make a big difference in the outcome. Here are some strategies to elevate your crochet stacking toy patterns to the next level.
- Consistent Tension: Keeping the same tension throughout is key. It ensures that the toys stack well and the pieces fit together.
- Count Your Stitches: Make sure to count stitches and rounds as you go. Incorrect counts can lead to uneven stacking pieces. Use stitch markers to help you keep track.
- Test Fit as You Go: After finishing each piece, stack them to see how they fit. Adjust your pattern if needed before moving on to the next part.
- Smooth Edges: For a neat finish, pay attention to the edges of your pieces. They should be smooth and free from bulges or shrinks.
- Durable Joining: When assembling, use strong stitches to join the parts. This will make your toy sturdy and safe for play.
- Use the Right Stuffing Technique: Don’t overstuff or understuff. The right amount will allow the toys to stack but still keep their shape.
- Practice Makes Perfect: If you’re a beginner, start with simple patterns. As you gain confidence, tackle more complex designs.
- Washability: Consider how the toy will be cleaned. Use yarn and stuffing that can withstand washing, since kids’ toys often get dirty.
With these tips, you’re well on your way to mastering the craft of crochet stacking toys. Keep practicing, and soon you’ll be making intricate and durable playthings that will be cherished for years.
Crochet Stacking Toys for Different Skill Levels
Crochet stacking toy patterns can cater to various expertise levels, from beginners to pros. Beginners might favor simple ring designs or basic animal shapes. Those with more experience can aim for detailed stacks. Automated patterns that change colors or include intricate textures may appeal to advanced crocheters.
For Novice Crocheters
As a newbie, start with simple shapes like rings or balls. These require just basic crochet stitches—single, slip, and maybe double crochet. Patterns for novices focus on teaching the basics and ensuring a sense of achievement. Repeating the same stitch helps build confidence and muscle memory.
For Intermediate Crocheters
Intermediate-level patterns introduce a variety of stitches and color changes. These may form parts of animals or objects. The patterns might include basic assembly, encouraging skill growth. Practicing these patterns prepares a crocheter for more complex projects.
For Experienced Crocheters
Experts can enjoy patterns with shaping, detailed color work, and small, intricate parts. They might crochet complex animal figures or themed sets where each piece stacks onto the next. Their patterns may integrate texture and advanced techniques for a professional touch. It’s all about challenging skills and creating unique, detailed toys.
No matter the skill level, each crafter should ensure their creation is safe, washable, and free from sharp edges. This ensures the toys are as practical as they are charming. Remember to count stitches carefully and maintain consistent tension for perfect fit. With practice, crocheters can advance through levels, trying out new designs and techniques. Happy crafting!

Adding Textures and Colors to Crochet Stacking Toys
Adding different textures and colors to crochet stacking toys can make them even more enticing. Here’s how you can enhance your creations:
- Choose Vibrant Yarns: Bright, contrasting colors catch a child’s eye. Pick yarn shades that stand out.
- Play with Texture: Introduce bobbles, popcorn stitches, or ribbing to make each piece interesting to touch.
- Create a Theme: Use colors and textures that fit a certain theme, like an ocean set with blues and greens, and wavy textures for water.
- Add Layers: Crochet layers or frills can give a 3D effect and add a tactile dimension to the toys.
- Contrast Colors: Use contrasting colors for different parts of the toy. This can help teach kids about color.
- Vary the Thickness: Mix thick, chunky yarn with finer strands through the toy for a varied feel.
Combining textures and colors not only makes the toys more engaging but also stimulates a child’s sensory development. Just remember to ensure all elements are securely attached and safe for play.
Crochet Stacking Toy Safety and Maintenance
Ensuring the safety and longevity of crochet stacking toys is crucial. Here are essential guidelines to follow:
- Inspect Before Play: Check toys for any loose yarn or parts. Repair if needed to avoid choking hazards.
- Clean Regularly: Wash toys often, as they can harbor germs. Use gentle, non-toxic soap and cool water.
- Dry Thoroughly: After washing, let toys air dry completely. Moist toys can develop mold.
- Store Properly: Keep them in a clean, dry place. Avoid direct sunlight to prevent color fading.
- Teach Safe Use: Show kids how to play gently. Rough play can damage the toys.
- Follow Pattern Guidelines: Use the recommended materials to ensure toys hold up well.
- Update Safety Features: Replace safety eyes or other parts when they show wear.
By caring for your crochet stacking toys properly, you can keep them safe, clean, and in good condition. This ensures that they remain enjoyable and educational tools for young ones for a long time.