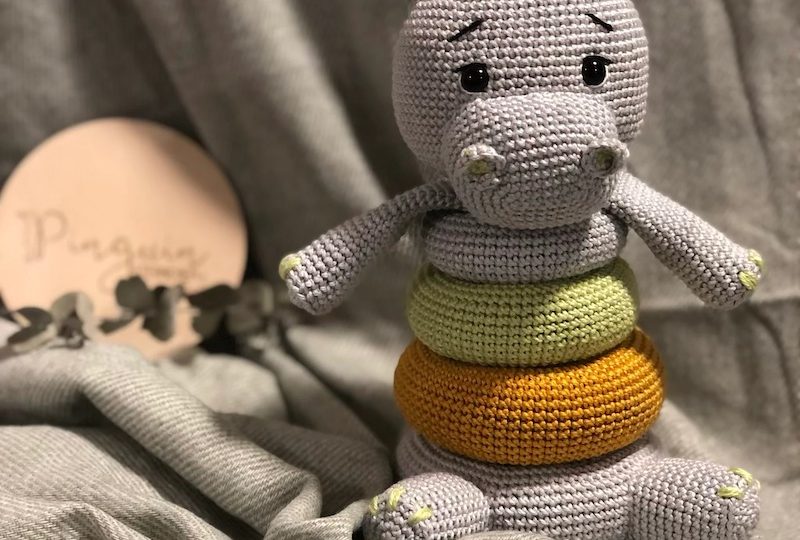
A Guide of the Handmade Crochet Hippo Stacking Toy
Introduction to Crochet Stacking Toys
Crochet stacking toys have become a cherished part of childhood playtime. They offer hands-on fun and help in the development of fine motor skills among young children. These toys are typically made up of multiple parts that stack together. The process of putting them together and taking them apart offers a gentle challenge for little ones. For many crafters, creating a crochet hippo stacking toy provides both a peaceful hobby and a way to make a special, personalized gift for a child.
The appeal lies in the toy’s soft texture and the satisfaction of creating a playful item with your own hands. To get started, you’ll need basic crochet skills and the ability to follow pattern instructions. With patience and creativity, you can crochet a delightful hippo that’s sure to be treasured for years. In this guide, we’ll cover the essential steps to making your very own crochet hippo stacking toy, from selecting the right materials to adding personal touches.

Choosing the Right Yarn and Materials
Selecting the appropriate yarn and materials is crucial for creating a crochet hippo stacking toy that is both durable and cuddly. The right yarn will ensure that your hippo is soft to the touch, sturdy enough to maintain its shape, and safe for children to play with. Here are some tips to help you choose the best materials for your project:
Yarn Selection
- Opt for a yarn that is soft, washable, and hypoallergenic, especially if the toy is for a young child.
- Cotton or acrylic yarns are great choices as they are gentle on the skin and easy to clean.
- Choose a weight of yarn compatible with your crochet hook size for ease of handling.
- Consider the color of your yarn; soft, pastel colors are often appealing for baby toys.
Hook and Other Materials
- Select a crochet hook that matches the recommended size for your yarn to keep stitches uniform.
- Make sure you have a sharp pair of scissors and a yarn needle to finish off your work neatly.
- Stuffing is necessary to give your hippo shape and softness. Use a synthetic, machine-washable stuffing.
- For added safety, you may want to use plastic safety eyes that lock in place or embroider the eyes with yarn.
By carefully selecting your yarn and materials, you can ensure that your crochet hippo stacking toy is attractive, pleasant to the touch, and crafted to last.
Step-by-Step Crochet Hippo Pattern
To start crafting your very own crochet hippo stacking toy, following a clear, well-outlined pattern is key. Even if you are new to crocheting, this step-by-step pattern will guide you through each stage of the process. We’ll begin by gathering all the materials you need and then dive into the specific crochet techniques you’ll be using. Remember, take your time and enjoy the journey of creating something unique and special.
Materials Needed
Before we delve into the crochet techniques, let’s ensure you have all the materials required for this project:
- Soft, washable yarn in your choice of colors.
- A crochet hook that matches your yarn weight.
- A pair of scissors and a yarn needle for finishing touches.
- Hypoallergenic, machine-washable stuffing to fill your hippo.
- Safety eyes or embroidery floss for the hippo’s eyes.
- A stitch marker to help keep track of rounds.
- The crochet pattern for your hippo stacking toy.
Ensure all your materials are ready to go and easily accessible for a smooth crocheting experience.
Crochet Techniques Used
You’ll need to be familiar with a few basic crochet techniques to create your hippo stacking toy:
- Creating a magic ring to start off the body parts.
- The single crochet stitch (sc) for most of the work.
- Increases (inc) and decreases (dec) to shape the toy.
- Working in continuous rounds to form the hippo’s body segments.
- Changing colors, if you want to add different shades to your hippo.
- Finishing off and weaving in ends to secure your work.
By mastering these techniques, you will be able to craft a playful and sturdy crochet hippo stacking toy that any child would adore. In the following sections, we’ll put these skills into action to assemble your hippo.

Assembling Your Crochet Hippo Stacking Toy
After mastering the required crochet techniques and gathering all your materials, you are now ready to assemble your crochet hippo stacking toy. Here’s a step-by-step guide to putting your handmade creation together:
Joining the Parts Together
- Begin by stuffing each body segment firmly but not too tightly.
- Align the parts as per the pattern instructions, typically from largest to smallest.
- Use your yarn needle and a length of yarn to sew the parts together.
- Make sure to stitch evenly and securely to withstand play.
Attaching the Eyes
- Place the safety eyes between the desired rows on the head or embroider them with yarn.
- If using safety eyes, insert them before completely closing the head.
Final Touches
- Sew on any additional features, such as ears or a tail, following the pattern.
- Weave in all loose ends to keep your toy neat and tidy.
- Give your hippo stacking toy a gentle squeeze to adjust the stuffing and shape.
Completing your crochet hippo stacking toy is a gratifying process, resulting in a unique and special item. Taking the time to assemble your toy with care will ensure it can be loved and enjoyed for many years to come. Remember to keep it simple, enjoy the process, and revel in the delight of your finished product.
Safety Tips for Crochet Toys
Creating a safe crochet hippo stacking toy is of the utmost importance. When crafting toys intended for children, particularly infants and toddlers, you must consider potential hazards. Here are critical safety tips to keep in mind:
Use Safe Materials
- Choose yarn that’s non-toxic and flame retardant.
- Avoid yarns with loose fibers that could be ingested or inhaled.
- Ensure any stuffing material is hypoallergenic and won’t bunch up to form lumps.
Secure Attachments
- Fasten all parts of the toy securely to prevent them from being pulled off.
- Embroider facial features instead of using small, detachable items like buttons.
Check for Choking Hazards
- Be cautious with the size of the parts; they should not be small enough to pose a choking risk.
- Regularly inspect the toy for any wear and tear that could lead to small pieces breaking off.
Follow Age Recommendations
- Consider the age of the child when selecting or designing patterns.
- Avoid intricate designs with small, detachable parts for younger children.
By adhering to these safety guidelines, you can ensure your crochet hippo stacking toy is both a delightful and secure plaything. Keep safety at the forefront throughout the creation and inspection of your toy to provide peace of mind while the child enjoys their new handmade friend.
Personalizing Your Hippo Stacking Toy
Personalizing your crochet hippo stacking toy adds a special touch that makes it uniquely yours. Here are some suggestions to infuse personality into your creation:
Choose Unique Colors
- Pick colors that reflect the child’s favorites or match a nursery theme.
- Mix and match hues to create a one-of-a-kind color scheme.
Add Textures
- Use different yarn textures to add sensory variety to the toy.
- Incorporate ribbons or fabric patches for a tactile experience.
Embellish with Details
- Sew on a cute bow or a little bell to the hippo’s neck for charm.
- Include crochet flowers or appliqués to give the hippo character.
Personalized Stitch Patterns
- Introduce unique stitch patterns on the belly or the back for a special touch.
- Experiment with stripes, spots, or other designs using basic crochet techniques.
Monograms and Names
- Embroider the child’s initials or name on the hippo to personalize it.
- Add the date or a special message on a sewn tag to commemorate an occasion.
By taking the time to personalize your crochet hippo stacking toy, you make it more meaningful for the child. The additional effort shows your care and attention to detail, resulting in a toy that’s treasured all the more.

Caring for Your Crochet Toy
Caring for your crochet hippo stacking toy ensures its longevity and safety. Here is a handy guide to help you keep this beloved toy in great condition:
Washing and Cleaning
- Hand wash your toy gently using a mild detergent.
- Rinse thoroughly to remove all soap residues.
- Gently squeeze out excess water without wringing, to maintain its shape.
- Lay it flat on a towel to air-dry completely.
Storage Tips
- Store in a cool, dry place away from direct sunlight to prevent colors from fading.
- Avoid placing heavy objects on top of the toy to keep its form intact.
Repairing Wear and Tear
- Check regularly for any loose stitches or damage.
- Sew any openings or weak spots with matching yarn to fix them promptly.
- Replace the stuffing if it becomes lumpy or uneven to ensure softness.
Child’s Interaction
- Teach children to play gently with the toy to avoid damage.
- Supervise younger children to ensure they do not pull apart the yarn.
By following these care instructions, your crochet hippo stacking toy can stay clean, safe, and vibrant for the child to enjoy. Regular maintenance will also help to prevent the toy from becoming a hazard. When the toy is well cared for, it can be a cherished part of playtime for years to come.
Where to Find Crochet Hippo Stacking Toy Patterns
Finding the perfect pattern for your crochet hippo stacking toy is essential for success. Here are some places to start your search:
Online Crochet Communities
- Websites like Ravelry and Etsy offer a variety of patterns from designers worldwide.
- Crochet Facebook groups and forums are also good places to request or exchange patterns.
Crochet Blogs and Websites
- Look for blogs dedicated to crocheting; they often share free patterns.
- Subscribe to crochet websites for updates on new patterns and tutorials.
Craft Books and Magazines
- Check out crochet and crafting magazines at your local bookstore or library.
- Craft books often include a range of patterns, from beginner to advanced levels.
Local Yarn Shops
- Visit nearby yarn shops for pattern books and individual pattern leaflets.
- Shop owners can provide personal recommendations based on skill level.
Crochet Workshops and Classes
- Join a workshop to learn and receive exclusive patterns from the instructor.
- Classes at community centers or craft stores may come with project patterns.
Explore these resources, and you’ll find the right pattern to bring your crochet hippo stacking toy to life. Happy crocheting!