Crochet Stacking Toy Pattern Essentials
Introduction to Crochet Stacking Toys
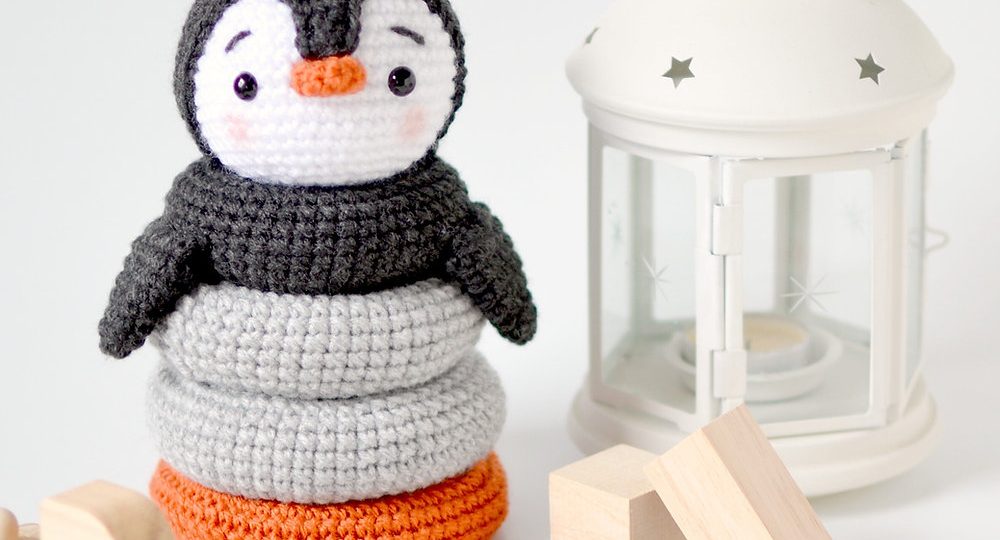
Crochet stacking toys are delightful playthings that capture the attention of young and old alike. As you embark on creating these whimsical items, it’s like weaving a tale of colors and coziness with every stitch. Not only do they spark joy for the little ones, but they also offer an avenue for crocheters to express their creativity and skill.
For starters, a crochet stacking toy pattern typically consists of multiple components. These are crocheted rings or shapes that can fit onto a central pillar. The objective for the child is to stack these pieces in the correct order. It develops their motor skills and challenges their problem-solving abilities.
These toys are usually soft, lightweight, and free of sharp edges. This makes them a safe option for babies and toddlers. Parents can rest assured of the toy’s safety when little ones are at play. Moreover, they are washable, which is a relief for maintaining hygiene.
Crafting a stacking toy calls for basic crochet knowledge and an understanding of applying that to a three-dimensional project. As you progress through this blog, you’ll learn the essentials like choosing materials, patterns, and colors. You will also pick up techniques for crafting the toy’s base ring and customizable stackable pieces.
Whether you are a seasoned crocheter or a beginner, creating a crochet stacking toy can be a truly rewarding project. With your crochet hook and yarn, you are all set to fashion a personal, handmade gift that stands out in a world of mass-produced toys.
As we delve deeper into this guide, keep in mind the joy that your handcrafted toy will bring. Remember to infuse your project with love and care in every stitch. Let’s get started on this crafting journey that combines fun, learning, and the warmth of a handmade touch.

Essential Materials for Crafting a Stacking Toy
To start crafting your crochet stacking toy pattern, you need to gather some essential materials. Here’s a concise list of what you’ll need for your project:
- Quality Yarn: Choose soft, durable yarn that’s safe for babies. Consider cotton or acrylic blends.
- Crochet Hooks: The size of your hook should match your yarn weight. A comfortable grip is also important.
- Stuffing: Use hypoallergenic stuffing to fill your stackable pieces. This keeps them light and huggable.
- Stitch Markers: These help you keep track of your rounds and ensure consistent sizing.
- Scissors: A sharp pair allows for clean cuts of yarn as you work.
- Yarn Needle: You will need this to weave in ends and assemble the toy components.
- Safety Eyes: If you decide to add eyes, make sure they are secure and child-friendly.
- Pattern: A clear crochet stacking toy pattern is crucial. It will guide your project from start to finish.
- Tape Measure: To check the dimensions of your pieces as you go.
Gather these materials before you start. This ensures a smooth and uninterrupted crocheting process. Having everything on hand also lets you focus on the joy of creating your toy.
Step-by-Step Guide to Crocheting the Base Ring
The base ring is the foundation of your crochet stacking toy pattern. It’s important to create a stable and even base to ensure the stackable pieces fit well. Here’s a simplified step-by-step guide to help you crochet the perfect base ring for your toy:
- Selecting Your Yarn and Hook: Start by choosing the appropriate yarn and matching hook size as outlined in the materials section.
- Starting with a Slip Knot: Create a slip knot on your hook to begin the foundation of the ring.
- Making the Foundation Chain: Chain a few stitches; the number will depend on your pattern. Ensure your chain is not too tight.
- Joining the Chain Ends: Bring the first and last chains together with a slip stitch. This forms the base ring.
- Building the Ring Height: Crochet in the round, adding rows until your ring reaches the desired height.
- Maintaining Tension: Keep your stitches even and firm but not too tight. Consistent tension keeps the shape uniform.
- Checking the Size: Use your tape measure to check the diameter of the base ring. It should match the pattern’s specification.
- Finishing the Ring: Once at the correct size, snip your yarn and pull it through the loop to secure.
- Weaving in Ends: Use your yarn needle to weave in any loose ends for a neat finish.
With these steps, you’ll have a well-crafted base ring ready for the stackable pieces. Keep practicing to achieve uniform stitches and the perfect tension. Your base ring sets the tone for the rest of the toy, making it essential to take your time and ensure accuracy in each step.
Techniques for Creating Interchangeable Stackable Pieces
Creating interchangeable stackable pieces is where your crochet stacking toy pattern comes to life. These elements allow the toy to be both fun and educational. Let’s walk through the key techniques:
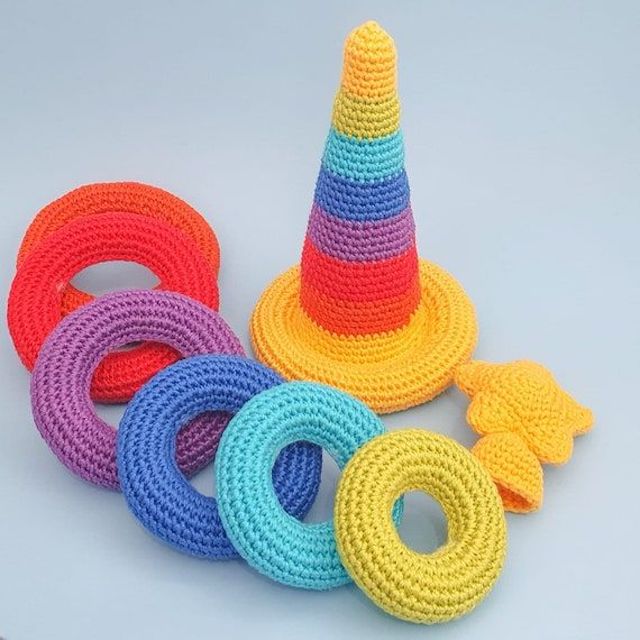
- Choosing the Right Shapes: Decide on varying shapes like spheres, cubes, or cones. Different shapes teach kids about geometry.
- Ensuring Compatibility: The pieces must fit snugly over the base ring. Measure the inner diameter of each piece against the ring.
- Adding Texture: Incorporate textured stitches for a sensory experience. Think bobbles, puff stitches, or ridges.
- Keeping Consistent Size: Make sure all pieces have a similar scale. This aids in easier stacking for children.
- Varying Difficulty: Design some pieces to be easier to stack than others. This challenges and encourages problem-solving.
- Crochet in the Round: Master crocheting in the round as it is essential for creating smooth, round shapes.
- Securing Loose Ends: Tuck and secure all loose yarn ends. This prevents unraveling and keeps the toy safe.
By mastering these techniques, you will create a crochet stacking toy pattern that’s not only charming but also promotes motor skills and cognitive development. Plus, the satisfaction of crafting something with varied complexity levels will keep your crocheting experience interesting and challenging.
Customizing Your Toy with Colors and Textures
When making a crochet stacking toy pattern, choosing colors and adding textures can bring your project to life. These elements make each toy unique and appealing. Here are some tips to guide you in customizing your crochet stacking toys.
Selecting Color Schemes
- Think About the Audience: Choose bright, contrasting colors for babies, as they respond well to them. For older children, consider their favorite colors.
- Plan a Palette: Organize a palette that includes a mix of neutral tones and pops of color. This can be visually stimulating.
- Color Transition: Use gradual color transitions for a fascinating effect. Try ombre or rainbow sequences.
Incorporating Textures
- Stitch Variety: Introduce different crochet stitches to create textures. Use simple stitches for beginners and more complex ones for experienced crocheters.
- Touchable Features: Add elements like loops, fringes, or tassels. These can be interesting for children to touch and feel.
- Safety First: Ensure all textured parts are secure and cannot be easily pulled off by little hands.
By considering the audience, choosing a pleasing color scheme, and introducing a variety of textures, you can create a crochet stacking toy pattern that is beautiful and engaging. This customization will not only add to the play value but also to the aesthetic appeal of the handmade toy.

Safety Tips for Crochet Toys
When crafting a crochet stacking toy pattern, safety is paramount. Here are essential tips to ensure your toys are safe for little ones:
- Use Safe Materials: Always select yarns and fillings that are non-toxic and hypoallergenic.
- Avoid Small Parts: For children under three, avoid using small pieces like buttons that can be choking hazards.
- Secure Attachments: If adding eyes or decorations, make sure they’re tightly fixed and can’t be pulled off easily.
- Tight Stitches: Crochet with tight stitches to prevent stuffing from coming out. This also helps the toy keep its shape.
- Washability: Use materials that are machine washable for easy cleaning. This ensures the toy remains hygienic.
- Durable Design: Create toys that withstand rough play. Durability prevents them from breaking into hazardous parts.
- Check for Sharp Edges: There should be no sharp edges or points on the toy. Everything must be soft and smooth.
- Age Appropriateness: Design the toy with the age of the child in mind. Make sure the toy is suitable for their developmental stage.
By following these safety tips, you can create a crochet stacking toy that’s not only fun and educational but also safe for children to play with. Parents can feel confident when their child is engaging with your handmade toy.
Finishing Touches: Assembly and Decoration
Once you have crocheted all the pieces for your crochet stacking toy pattern, it’s time for assembly and decoration. Here’s how to add those finishing touches that make the toy complete:
- Assemble with Care: Start by stacking the rings or shapes on the base ring. Align each piece so that it sits well.
- Stitch Securely: Use a yarn needle and matching yarn to connect the parts. Ensure tight and neat stitches for a firm hold.
- Add Decorative Elements: Consider crocheting cute embellishments like flowers, stars, or animal faces. Attach them securely to the toy.
- Incorporate Safety Eyes: If the design calls for eyes, attach safety eyes according to the instructions. Make sure they’re fixed tight.
- Embroider Features: For facial features or patterns, use embroidery. This adds detail without loose parts.
- Apply Final Trims: Trim any excess yarn or uneven areas. This gives your toy a polished look.
- Quality Check: Go over the toy to check for loose ends or sharp points. Everything should be smooth and sturdy.
- Create a Cozy Feel: For a soft finish, brush the surfaces with a yarn brush. This can make the toy cuddlier.
Your crochet stacking toy pattern is now ready to delight and educate. With careful assembly and imaginative decoration, your toy will surely be cherished and enjoyed.
Maintenance and Care for Crochet Stacking Toys
Proper maintenance and care are crucial for the longevity of your crochet stacking toy pattern creations. Here are some straightforward tips to help parents and caregivers keep these precious playthings in top condition:
- Regular Washing: Hand wash or use a gentle machine cycle with a mild detergent. Ensure toys are completely dry before use.
- Spot Cleaning: Address spills and stains immediately with a damp cloth to prevent them from setting in.
- Air Drying: Lay the toys flat in a well-ventilated area. Avoid direct sunlight which can cause colors to fade.
- No Harsh Chemicals: Skip bleach or fabric softeners. These can damage the yarn and affect the toy’s softness.
- Storage: Store toys in a cool, dry place away from direct heat sources to maintain their shape and texture.
- Regular Checks: Inspect the toys often for any loose parts or damage, especially after cleaning or rigorous play.
- Mending: Repair any minor tears or loose ends promptly to prevent further unraveling.
- Avoid High Heat: Never iron or expose the toys to high temperatures as this could melt the fibers or misshape the item.
These simple steps will not only keep the crochet stacking toys looking fresh but also ensure they remain safe and delightful for playtime. Always remember, care and maintenance are part of the joy that comes with owning a handcrafted toy.