Free Crochet Stacking Ring Toy Patterns
Introduction to Crochet Stacking Ring Toys
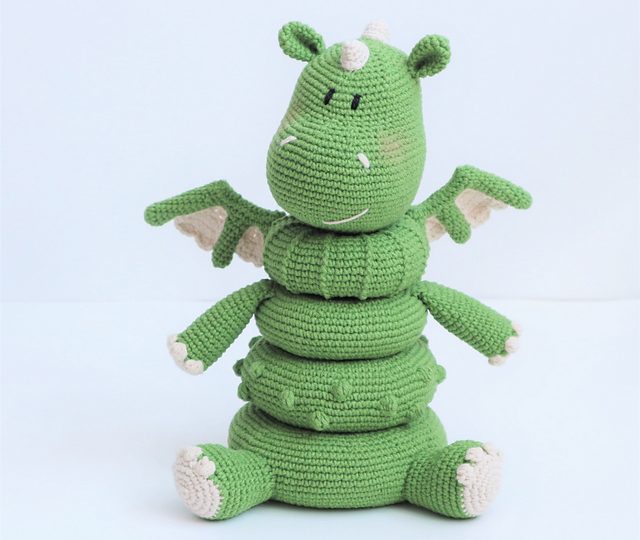
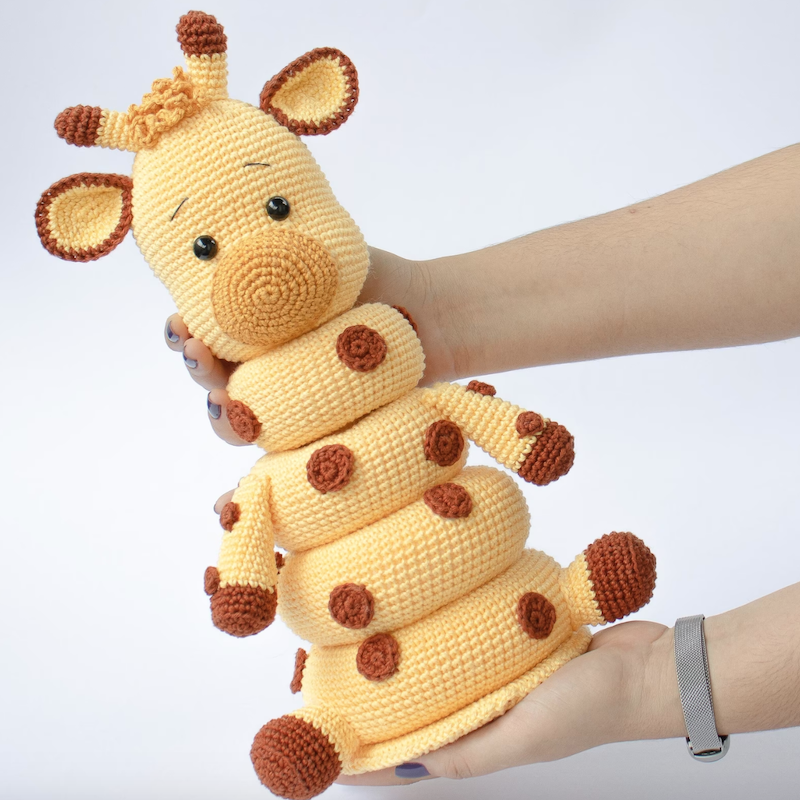
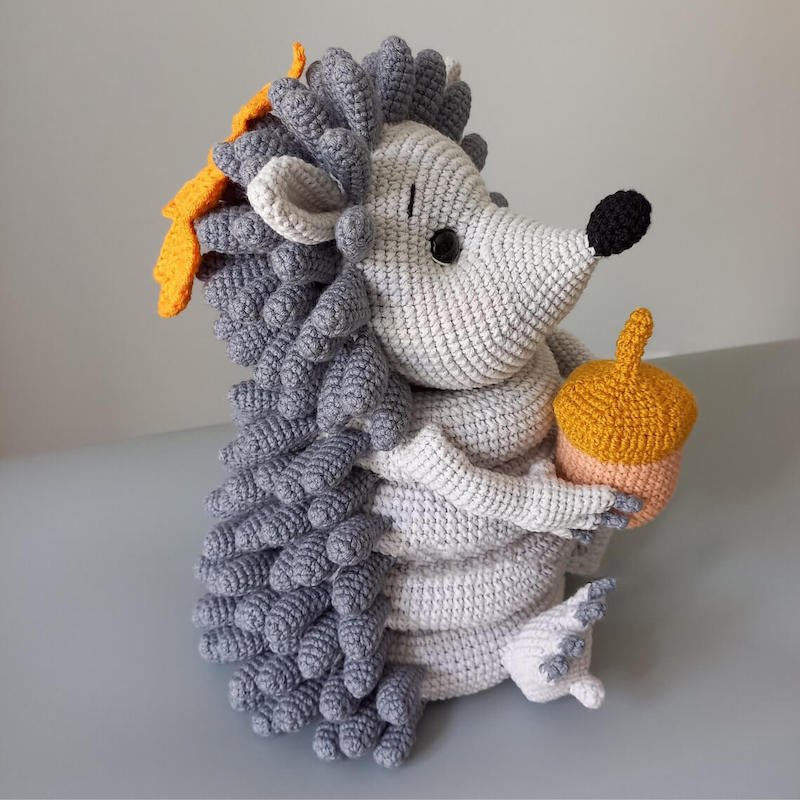
Crochet stacking ring toys are popular, cuddly playthings for little ones. They consist of soft rings, each one smaller than the last, stacked onto a base or a pillar. These toys serve as excellent baby gifts and provide a gentle way to help improve a child’s hand-eye coordination and motor skills. Crafting your own set with a crochet stacking ring toy pattern free of charge is both a fulfilling and creative endeavor. It lets you personalize colors, textures, and sizes to create a unique educational toy.
Beyond their developmental benefits, crochet stacking rings are a hit with parents and caregivers for their safety and washability. Unlike plastic counterparts, they’re soft, devoid of sharp edges, and easy to clean. This makes them an ideal choice for babies who are going through the teething phase. They’re also lighter and less likely to cause harm if thrown or dropped. Moreover, because they’re handcrafted, they can be made with love as heirloom toys that can be passed down through generations.
Starting your crochet journey with stacking ring toys is a great way to dip into toy-making. The patterns can range from simple to complex, accommodating crocheters of all skill levels. In this blog, we will guide you through the process of making one with a free crochet stacking ring toy pattern. We’ll cover the essential materials and tools you’ll need, basic crochet techniques, a step-by-step guide, color and design ideas, safety tips, and finishing touches. Whether you’re a beginner or an experienced crafter, you’ll find something to help you on your way to creating a delightful stack of crocheted rings.
Essential Materials and Tools
To start your crochet stacking ring toy project, gathering the right materials and tools is fundamental. Here’s what you’ll need:
- Yarn: Choose a soft, machine-washable yarn that’s gentle on baby’s skin. Opt for cotton or acrylic blends in your desired colors.
- Crochet Hook: The size of your hook will depend on the yarn you’re using. Look at the yarn label for recommendations.
- Scissors: A good pair of scissors will make trimming ends easier.
- Stitch Markers: These are helpful for marking the start or end of a round and keeping track of stitch counts.
- Stuffing: You’ll need safe, non-toxic stuffing to give volume to the rings.
- Yarn Needle: A needle with a large eye is best for weaving in ends and assembling the rings.
- Pattern: Having a ‘crochet stacking ring toy pattern free’ guide is crucial. Find one that suits your skill level.
The quality of your materials plays a huge role in the safety and finish of the toy. Make sure to pick non-allergic and durable supplies to ensure the toy can withstand frequent handling and washing. Before you start, prep your work area with all the tools laid out. This makes the process smoother and more enjoyable. Remember, following the pattern closely with the right tools will lead you to a successful and adorable result.
Basic Crochet Techniques for Making Stacking Rings
To crochet stacking rings that are both sturdy and appealing, mastering some basic crochet techniques is essential. Here are the foundational skills you will need:
- Chain Stitch (ch): This is the beginning step for most crochet projects. It creates a foundation from which you build your work.
- Single Crochet (sc): A fundamental stitch that is simple to perform. It provides a tight and even texture suitable for the rings.
- Slip Stitch (sl st): Used to join stitches or end rounds smoothly. It’s a technique for moving to the next stitch without adding height.
- Increasing (inc): To make the rings larger as you work, you’ll need to learn how to increase your stitches at certain intervals.
- Magic Ring: This technique starts your work in a circle and is perfect for the center of the rings. It helps to avoid a hole in the middle.
- Working in the Round: Since the rings are circular, you need to be comfortable making stitches into a spiral.
- Finishing Off: Learning how to fasten off your crochet neatly will ensure that your work doesn’t unravel.
Each of these stitches and techniques will come into play as you follow the ‘crochet stacking ring toy pattern free’ guide. Practicing these techniques will help you to create smooth, even stitches that make up the toy’s rings. Remember, consistent tension is key to ensuring the rings stack correctly and look uniform. Take your time to learn and master these techniques for the best outcome. With practice, you can move onto more advanced stitches and methods to add texture and interest to your stacking ring toy project.
Step-by-Step Guide to Crochet Stacking Rings
Following a clear, step-by-step guide will help ensure your crochet stacking ring toy turns out beautifully. Let’s walk through the basic steps with a free crochet stacking ring toy pattern.
- Start with a Magic Ring: Begin by making a magic ring, which creates a tight center with no holes. This is the foundation for your first ring.
- Chain Stitch (ch): From the magic ring, chain the number of stitches the pattern calls for. This sets the initial size for your ring.
- Single Crochet (sc): Insert single crochet stitches into the magic ring. Continue sc around according to the pattern, ensuring even spacing.
- Increase Rounds: As the rings get larger, use the increase method to add more stitches. Make sure to space your increases evenly to maintain a circular shape.
- Measure and Fit: Regularly check the diameter of the ring to match the pattern specs. This ensures a proper fit when stacking.
- Finish the Ring: Once the ring reaches the desired size, use a slip stitch (sl st) to join and finish. You may want to place a marker before cutting the yarn.
- Weave in Ends: Use your yarn needle to weave in loose ends. This step tidies your work and secures the yarn.
- Stuffing: Before completely closing the ring, stuff it with non-toxic filling to the desired firmness.
- Repeat for More Rings: Use the same steps to make additional rings, each one slightly larger than the previous.
- Create the Base: Depending on your pattern, you may need to crochet a base or pillar to stack the rings on.
By following these steps and using a free crochet stacking ring toy pattern, you can craft a playful and safe toy for babies. Keep tension consistent for best results. The beauty of crocheting is in the details, so take your time with each step to ensure quality craftsmanship.
Color Choices and Design Ideas for Stacking Rings
When creating a crochet stacking ring toy, color selection and design are vital. Here’s how you can choose and apply them:
- Bold or Pastel: Decide if you want bright, bold colors or soft pastels. Bold hues captivate, while pastels soothe.
- Color Themes: Themes like rainbow, ocean, or jungle inspire color choices. Pick a theme for a cohesive look.
- Contrasting Colors: Use contrasting colors for visual stimulation. It aids in the baby’s visual development.
- Variegated Yarns: These yarns change color automatically. They add a unique twist without needing many color swaps.
- Textures: Mix yarn textures for sensory play. Think about ribbed stitches or bobbles.
- Additions: Consider adding ribbons or ruffles for extra flair. But ensure they’re secure.
When designing, think of who it’s for. A toy for a baby girl might have florals, whereas one for a boy might incorporate geometric shapes. Always match colors with care, ensuring they’re pleasing to the eye. Patterns like stripes and polka dots add fun variation. For a more educational twist, number or letter appliqués teach as they entertain.
In the end, the design should be safe and stimulating. Double check that colorants in the yarn are non-toxic. Keep the design clutter-free, making it easy for little hands to grasp. With these tips, your crochet stacking ring toy will be a hit with both babies and parents.
Safety Tips for Crochet Toys
Creating crochet toys is not just about the aesthetics; safety is paramount, especially when they’re meant for babies. Here are some essential safety tips to keep in mind for your crochet stacking ring toy pattern free projects:
- Check Yarn Labels: Always use yarn that’s safe for babies. Look for hypoallergenic and washable options.
- Tight Stitches: Ensure your stitches are tight enough to prevent little fingers from getting caught.
- Non-Toxic Stuffing: Choose stuffing that is non-toxic and resistant to fire. It should also be washable.
- Secure Attachments: If adding eyes or other decorations, make sure they’re firmly attached and can’t be easily removed.
- Avoid Small Parts: For children under three, avoid using small parts that can be a choking hazard.
- Washability: Make the toy easy to wash, as baby items need frequent cleaning.
- Regular Inspection: Check the toy regularly for signs of wear and tear that could be dangerous.
By following these guidelines, you can craft a safe and durable toy for infants to enjoy. Both the baby’s well-being and the joy of the toy’s receiver are worth this extra attention to detail.
Finishing Touches: Assembly and Decoration
Once you have all your crochet stacking rings and base completed, it’s time to add those final finishing touches that truly make the toy your own. Let’s go through the assembly and decoration process step-by-step.
- Assembly: Start by stacking the rings onto the base or pillar you’ve crafted. Make sure each fits snugly over the one beneath it. If the rings aren’t staying put, you may need to adjust the tightness of your stitches or the size of the rings.
- Decoration: Now for the fun part! You can personalize your crochet stacking ring toy with various decorative elements:
- Attach little crocheted flowers, hearts, or stars to the rings for added charm.
- Consider crocheted letters to spell out a child’s name on each ring.
- Embroider numbers on the rings to introduce early counting skills.
- Use surface crochet to add geometric designs or wavy lines for texture.
Remember to keep decorations flush against the toy or well-integrated so they don’t pose any safety risks. Also, avoid decorations that could come loose over time. Always prioritize the toy’s durability and the baby’s safety.
After assembly and decoration, give the toy a gentle wash if necessary, and inspect it one last time. Ensure all components are secure and ready for little hands to explore. With these final checks, your crochet stacking ring toy is complete and ready to be gifted or played with. By using a crochet stacking ring toy pattern free guide, you’ve created not just a toy, but a custom, heartfelt gift that is sure to be treasured.
Crochet Pattern Variations for Different Skill Levels
Crochet is a versatile craft that embraces all skill levels. Whether you are new to crochet or have been hooking for years, there’s a stacking ring pattern that matches your expertise. Here’s a breakdown of pattern variations for every crocheter:
- Beginners: Look for simple patterns with basic stitches like single crochet and slip stitch. Patterns without complex increases or decreases are ideal for starters.
- Intermediate Crocheters: You might enjoy patterns that introduce new shapes or techniques. These could include small embellishments or a variety of textures.
- Advanced Crafters: Challenge yourself with intricate stitches or complex colorwork. Patterns with detailed appliqués or multiple parts will provide a satisfying project.
When selecting a ‘crochet stacking ring toy pattern free’, always check the difficulty level. Many patterns will indicate if they are for beginners, intermediate, or advanced crocheters. Start with a pattern that feels comfortable, then progress to more challenging projects as your skills grow.
Remember, the key is patience and practice. Don’t be afraid to make mistakes – they’re part of learning. Use online tutorials and community forums if you need extra help. With each completed ring toy, you’ll not only bring joy to a child but also gain confidence in your crochet abilities.


